In this video, after developing and stacking our image, We are going to transform our base file - a tripod shot with a 14mm - into a powerful final image. editing in Photoshop through a layered workflow.
We'll begin by separating the sky and ground to treat them independently, correcting optical defects in the stars, and enhancing the volume and detail of the Milky Way by controlling light pollution. Finally, we'll apply atmosphere and color techniques to integrate the entire composition and achieve that polished, professional finish.
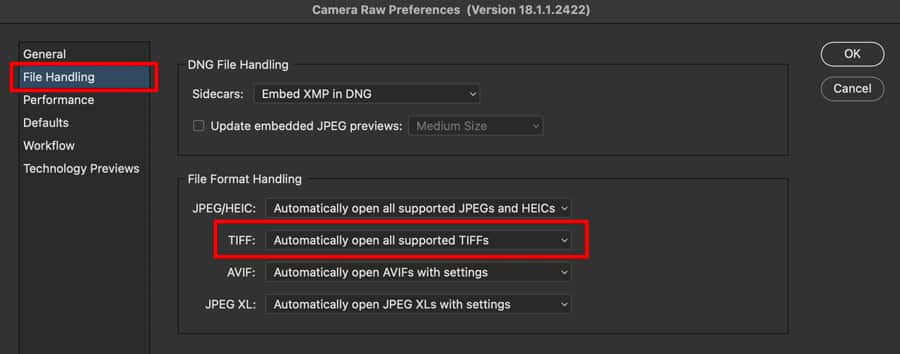
⚙️ Settings: Open TIFFs automatically in Camera Raw
To be able to apply pre-development adjustments to your TIFF files (such as those resulting from stacking) before they enter the Photoshop workspace, you must enable this option:
If you use Mac:
- Go to the top menu (top left): Photoshop > Settings (o Preferences).
- Select Camera Raw...
If you use Windows:
- Go to the top menu: Edition > Preferences.
- Select Camera Raw...
Final step (Same for both):
- In the window that appears, look for the tab or section File management (File Handling).
- In the section JPEG and TIFF, menu, pull down the menu of TIFF.
- Select the option: Automatically open all supported TIFF files.
- Click on OK.
From now on, every time you open a TIFF, Photoshop will first show you the Camera Raw interface so you can make initial adjustments.